I have started writing tips on my different blog instead of this one. Make sure to follow that one so that you can get latest updates. Here is the link- StackBlogger: Tips and Tricks about Programming
Also follow my another Blog where I write how to make money online, tips about blogging, content creation etc. Here is the link- FlexiPlanet: A hub for Content Marketing.
Today, we will learn about injecting Dependency Injection in ASP.Net MVC using Unity Container.
Before going further, we will learn what is Dependency Injection and what is Unity Container.
Dependency Injection is a Software design pattern which we use in C# to reduce class dependency, in other words we can say that it used to increase the loose coupling and makes the code more object oriented.
The Unity Container (Unity) is a lightweight, extensible dependency injection container. As we know, there are many dependency injection containers and unity is one of them.
Steps to implement DI (Dependency Injection) in project are as follows:-
Step 1 – Create a new ASP.Net MVC project
Open the Visual Studio and create a new ASP.Net MVC 4 Empty project as follows-

Step 2 – Add a new Model class
Add a new model class User.cs in Model folder of the project.
Replace the User.cs model class code with below code-
public class User { public string Name { get; set; } public string Email { get; set; } public double RollNumber { get; set; } }Step 3 – Add new interface
Add a new folder
IRepositoryin project and addIUserRepository.csinterface in the folder.Replace the
IUserRepository.csinterface code with below code-public interface IUserRepository { IEnumerable<User> GetAll(); }Add the namespace of
User.csmodel class in the above interface file.Step 4 – Add repository class
Add a new folder
Repositoryin project and addUserRepository.csclass in the folder.Replace the
UserRepository.csclass code with below code-public class UserRepository : IUserRepository { private List<User> users = new List<User>(); public UserRepository() { users.Add(new User { Name = "Jameer", Email = "jimcute8879@gmail.com", RollNumber = 123456789 }); users.Add(new User { Name = "Scott", Email = "scott@scott.com", RollNumber = 758735875 }); users.Add(new User { Name = "Dale", Email = "dale@dale.com", RollNumber = 8967804689 }); users.Add(new User { Name = "John", Email = "john@jonh.com", RollNumber = 4247437667 }); } public IEnumerable<User> GetAll() { return users.ToList(); } }Add the required namespaces for
IUserRepository.csandUser.csmodel class in the above class file.Step 5 – Install Unity Container package from Nuget
Run below command to install Unity Container through Nuget Package Manager console.
Install-Package Unity.Mvc4It will install all the required packages for Unity and will create a
Bootstrapper.csfile in the root directory of project.Now replace the
Bootstrapper.csclass file code with below code –public static class Bootstrapper { public static IUnityContainer Initialise() { var container = BuildUnityContainer(); DependencyResolver.SetResolver(new UnityDependencyResolver(container)); return container; } private static IUnityContainer BuildUnityContainer() { var container = new UnityContainer(); // register all your components with the container here // it is NOT necessary to register your controllers // e.g. container.RegisterType<ITestService, TestService>(); //------- Register your Signature and Implementation files here container.RegisterType<IUserRepository, UserRepository>(); //-------------------------------- RegisterTypes(container); return container; } public static void RegisterTypes(IUnityContainer container) { }Here you can see that I have registered
IUserRepository.csinterface andUserRepository.csclass file.Step 6 – Create a new Controller
Create a new
HomeController.cscontroller in the project as below –
Replace the
HomeController.csclass code with below code-public class HomeController : Controller { private readonly IUserRepository _userRepository = null; public HomeController(IUserRepository repo) { this._userRepository = repo; } public ActionResult Index() { var data = _userRepository.GetAll(); return View(data); } }Import the required namespaces.
Step 7 – Create a View
Create a new view
Indexas below – Make the view Strongly Typed withUser.csmodel class and choose Scaffolding templates:List
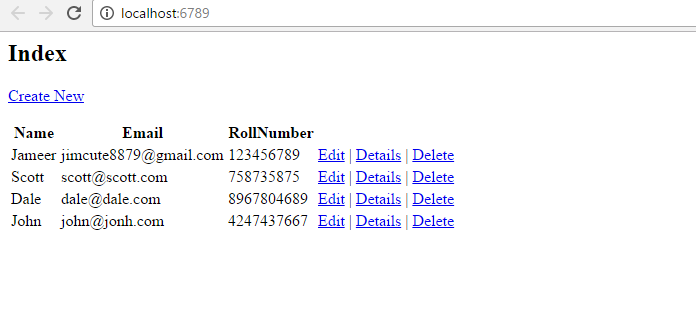
Step 8 – Run the project
You will see the list details as follows –
Conclusion
If you put a break point at HomeController constructor, you will see that the Unity has injected the implementation class.
That’s all!!!
Thanks for reading…